The Address Field and Title Label
In part one of this tutorial you created the user interface for a simple web browser, but it could only go to a single hardcoded page.
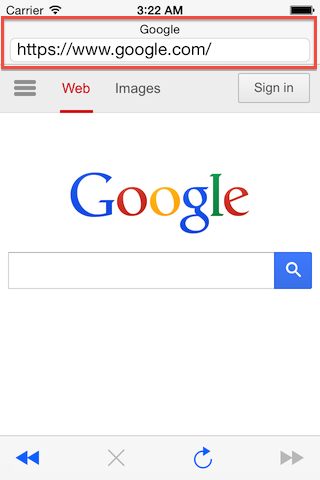
In this part of the tutorial, you will customize the Navigation Bar to add an Address Field and a Page Title Label. In contrast to the earlier pieces of the UI, these pieces will all be constructed in code since Interface Builder does not support customization of the Navigation Bar.
If you completed the previous tutorial you can simply continue on with your existing code, or if you prefer you can download the starting point code here: GitHub IDZWebBrowser Step3
Add Properties to Refer to the New UI Element
First you will need some properties to refer to the new UI elements. Modify your class extension to include the highlighted code.|
1 2 3 4 5 6 7 8 9 10 11 12 13 |
@interface IDZWebBrowserViewController () <UIWebViewDelegate> @property (weak, nonatomic) IBOutlet UIWebView *webView; @property (weak, nonatomic) IBOutlet UIBarButtonItem *back; @property (weak, nonatomic) IBOutlet UIBarButtonItem *stop; @property (weak, nonatomic) IBOutlet UIBarButtonItem *refresh; @property (weak, nonatomic) IBOutlet UIBarButtonItem *forward; @property (strong, nonatomic) UILabel *pageTitle; @property (strong, nonatomic) UITextField *addressField; - (void)loadRequestFromString:(NSString*)urlString; - (void)updateButtons; @end |
And copy and paste the following constants above the class extension.
|
1 2 3 4 5 6 |
static const CGFloat kNavBarHeight = 52.0f; static const CGFloat kLabelHeight = 14.0f; static const CGFloat kMargin = 10.0f; static const CGFloat kSpacer = 2.0f; static const CGFloat kLabelFontSize = 12.0f; static const CGFloat kAddressHeight = 24.0f; |
These are dimensions that, by trial and error, gave an acceptable layout for the title label and address field.
Creating the Page Title Label
Add the following code to yourviewDidLoad: method to create the page title label.
|
1 2 3 4 5 6 7 8 9 10 11 |
/* Create the page title label */ UINavigationBar *navBar = self.navigationController.navigationBar; CGRect labelFrame = CGRectMake(kMargin, kSpacer, navBar.bounds.size.width - 2*kMargin, kLabelHeight); UILabel *label = [[UILabel alloc] initWithFrame:labelFrame]; label.autoresizingMask = UIViewAutoresizingFlexibleWidth; label.backgroundColor = [UIColor clearColor]; label.font = [UIFont systemFontOfSize:12]; label.textAlignment = NSTextAlignmentCenter; [navBar addSubview:label]; self.pageTitle = label; |
In this code line 2 gives you a short hand for referring to self.navigationController.navigationBar, lines 5-8 create a label with a clear background, 12 point font and centered text, line 10 adds this label to the navigation bar and line 11 assigns it to your pageTitle property so that you can set its text later.
Creating the Address Field
To create the address bar, add this code just after the previous piece:|
1 2 3 4 5 6 7 8 9 10 11 12 |
/* Create the address bar */ CGRect addressFrame = CGRectMake(kMargin, kSpacer*2.0 + kLabelHeight, labelFrame.size.width, kAddressHeight); UITextField *address = [[UITextField alloc] initWithFrame:addressFrame]; address.autoresizingMask = UIViewAutoresizingFlexibleWidth; address.borderStyle = UITextBorderStyleRoundedRect; address.font = [UIFont systemFontOfSize:17]; [address addTarget:self action:@selector(loadRequestFromAddressField:) forControlEvents:UIControlEventEditingDidEndOnExit]; [navBar addSubview:address]; self.addressField = address; |
This code follows a similar pattern to the previous piece, creating the text field, adding it to the navigation bar and assigning it to a property. Line 9 is, however, worth comment. This line tells the text field to call loadRequestFromAddressField:, a method you are about to implement, when the user finishes editing.
Loading a URL from the Address Bar
Add the declaration ofloadRequestFromAddressField: to your class extension.
|
1 |
- (void)loadRequestFromAddressField:(id)addressField; |
Then add the following code to your implementation section.
|
1 2 3 4 5 |
- (void)loadRequestFromAddressField:(id)addressField { NSString *urlString = [addressField text]; [self loadRequestFromString:urlString]; } |
This code retrieves the text from the address field and uses the loadRequestFromString: method that you wrote previous to load the URL.
Updating the Page Title Label
To update the page title label you need to be able (obviously enough) to get the title of the web page. If you look at the documentation forUIWebView you will notice that there is no method to retrieve this information. The solution to this is to use some JavaScript to get the page title as shown here.
|
1 2 3 4 5 |
- (void)updateTitle:(UIWebView*)aWebView { NSString* pageTitle = [aWebView stringByEvaluatingJavaScriptFromString:@"document.title"]; self.pageTitle.text = pageTitle; } |
Add this code to your implementation section. Don’t forget to also add a declaration to the class extension as well!
|
1 2 3 4 5 6 |
- (void)webViewDidFinishLoad:(UIWebView *)webView { [UIApplication sharedApplication].networkActivityIndicatorVisible = NO; [self updateButtons]; [self updateTitle:webView]; } |
This function should be called whenever a page finishes loading, so modify your webViewDidFinishLoad: to do so.
|
1 2 3 4 5 6 |
- (void)webViewDidFinishLoad:(UIWebView *)webView { [UIApplication sharedApplication].networkActivityIndicatorVisible = NO; [self updateButtons]; [self updateTitle:webView]; } |
Remaining Issues
There are still a number of small issues that need to be taken care of. Tomorrow’s tutorial will address them. They are:
- the address field can get out of sync with the displayed page,
- the keyboard displayed is not the URL keyboard so it is awkward to type a URL,
- the keyboard auto-capitalization mode is inappropriately set,
- there is no clear button in the address field,
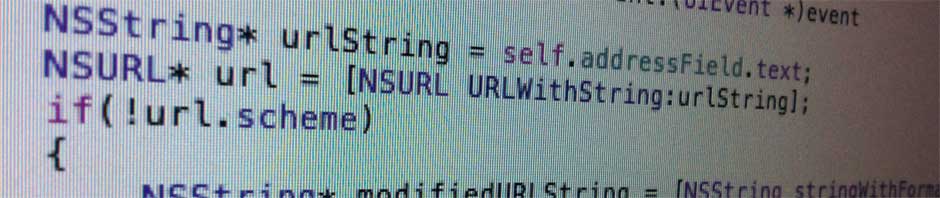
- if the user omits the
http://the page will not load, - if an error occurs, the user is never informed.
Download the Source Code
You can download the completed source code for this part of the tutorial here:
GitHub IDZWebBrowser Step4
Pingback: Tutorial: Building a Web Browser with UIWebView (Part 2) | iOS Developer Zone
Pingback: Tutorial: Building a Web Browser with UIWebView Revisited (Part 2) | iOS Developer Zone | Scott Brenner