A few days ago I published a post that showed how, with relatively little code, you could create a primitive 360º panoramic photo viewer in SceneKit. In this mini-post I am going to show how by adding SpriteKit and a pinch of AVFoundation to the mix that example can be extended to play 360º video.
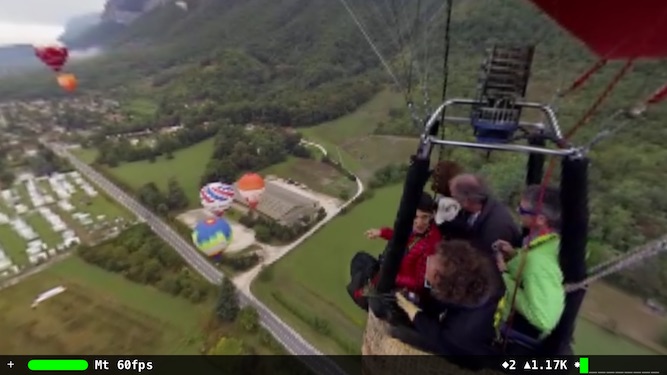
Still shot from 360º video of balloon flight.
Getting Started
The starting point for this project is a slightly refactored version of the PanoView project. To keep things simple I created a new repository 360Video on github where you can download the starter project.
Details of the code in the methods createSphereNode(material:), configureScene(node:) and startCameraTracking() can be found in the post SceneKit and CoreMotion in Swift.
Using Video as a Material in SceneKit
The process for using video as a material is a little convoluted. First you need a URL for a 360º video stream, not an easy task since most are siloed behind YouTube and Facebook players, then you create an AVPlayer to play the video, wrap the player in an SKVideoNode, add the node to an SKScene and use that SpriteKit scene as the material for your SceneKit geometry. Although this may sound a bit scary, the code is not actually too bad:
|
1 2 3 4 5 6 7 8 9 10 11 12 13 |
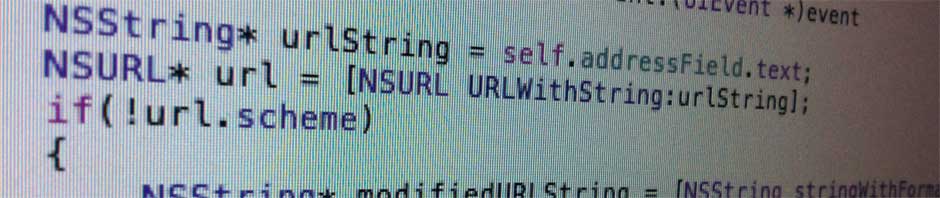
//let urlString = "http://all360media.com/wp-content/uploads/pano/laphil/media/video-ios.mp4" let urlString = "http://kolor.com/360-videos-files/kolor-balloon-icare-full-hd.mp4" guard let url = NSURL(string: urlString) else { fatalError("Failed to create URL") } let player = AVPlayer(URL: url) let videoNode = SKVideoNode(AVPlayer: player) let size = CGSizeMake(1024,512) videoNode.size = size videoNode.position = CGPointMake(size.width/2.0,size.height/2.0) let spriteScene = SKScene(size: size) spriteScene.addChild(videoNode) |
Then change the nil material in call below:
|
1 |
let sphereNode = createSphereNode(material:spriteScene) |
Finally make sure to call play(sender:) on the SpriteKit scene.
|
1 2 3 |
override func viewDidAppear(animated: Bool) { sceneView.play(self) } |
You should now be able to compile and run the project and enjoy either a balloon ride or sitting amongst the L.A. Philharmonic, depending on which URL you enable.
Conclusion
These few lines of code took a surprisingly long time to write, mainly because video texturing does not seem to work in playgrounds… and does Apple mention this in the documentation? Like, anywhere? If you guessed no for this one, you would be correct. So it was always unclear whether I was doing something wrong or whether it was a bug. Similarly an additional hack is needed to get this code to work on OS X. I will update this post with radar numbers and the OS X hack at a later time.
Putting this frustration aside, it is pretty cool that you can do this with so few lines of code. I should confess that the code does take some liberties: it hardcodes the video size, there is some slight of hand in the camera tracking to account for differences in the SpriteKit and SceneKit coordinate systems, and the tracking is prone to gimbal lock. In future posts I’ll show how to correct these problems.
The completed code can be found at the 360Video repository on GitHub.