By far the most popular tutorial series on this site has been the “Building a Web Browser with UIWebView” series. Over time, however, the tools and code presented have become outdated. Manual memory management has been replaced with Automatic Reference Counting (ARC), which greatly simplifies code. In Interface Builder, storyboards are now the preferred way of creating user interfaces (UIs). So it seemed high time that I revisited the series and updated the tutorials for Xcode 5 and iOS 7.
To get started create a single view project and name it IDZWebBrowser. The main view controller will be called IDZViewController; rename this to IDZWebBrowserViewController using refactoring (see How to Rename a Class using Refactor if you are not sure how to do this). I also recommend renaming the storyboard file to IDZWebBrowser.storyboard. These changes are to allow the web browser component to be more easily integrated into other projects. If this all sounds a little tedious you can download the starting code here: GitHub IDZWebBrowser Step0
Creating the User Interface
To create the user interface, click on the IDZWebBrowser.storyboard file. Add a UIWebView to your view controller by dragging a Web View from the Object Library (![]() ) onto the view controller, then embed the view controller in a navigation controller by clicking Editor > Embed in > Navigation Controller.
) onto the view controller, then embed the view controller in a navigation controller by clicking Editor > Embed in > Navigation Controller.
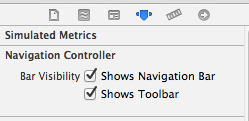 Then select the navigation controller and in Attributes Inspector click the Shows Toolbar check box.
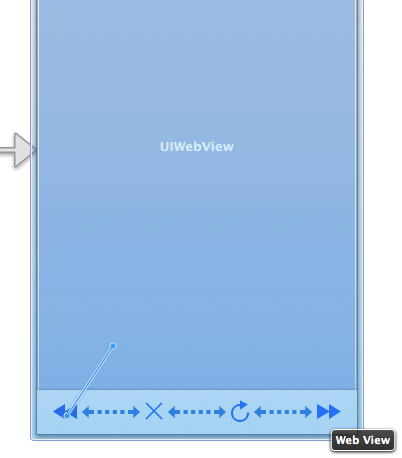
Now click on the Web Browser View Controller and drag four bar button items onto the toolbar. In the attributes inspector, working from left to right, set the identifiers of the buttons to Rewind, Stop, Refresh and Fast Forward. The buttons will be bunched on the left hand side of the toolbar. Add Flexible Space Bar Button Items between each pair of buttons. You storyboard should now look like the image below.
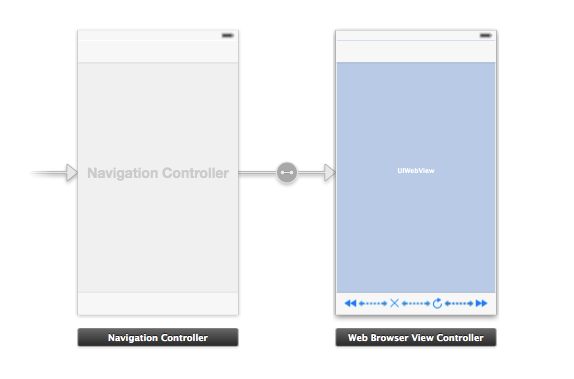
Now is a good time to save your work!
If you are having difficulty you can compare your work to this version: GitHub IDZWebBrowser Step1
Connecting the User Interface to Code
In this next section you will use Interface Builder to generate code to interact with the user interface. This can save you a lot of typing.
Creating IBOutlets
To get started, with the storyboard file still selected, click on the Assistant Editor (
 ) you should now see the view controller implementation file displayed side-by-side with the storyboard. If your screen is small it may be useful to hide your Navigator using the View > Navigators > Hide Navigator menu item, the
  Toolbar icon or the
 ⌘0 keyboard shortcut and/or your Utilities using the View > Utilities > Hide Utilities menu item, the  toolbar item or the
 ⌥⌘0 keyboard shortcut.
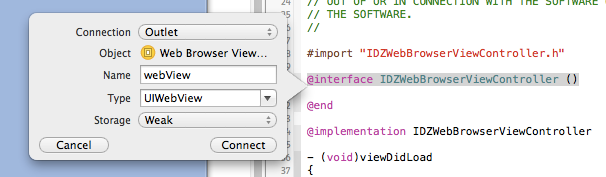
To create a property in your view controller to access your web view, click drag from the UIWebView on the storyboard to the class extension portion of the IDZWebBrowserViewController.m file as shown below.
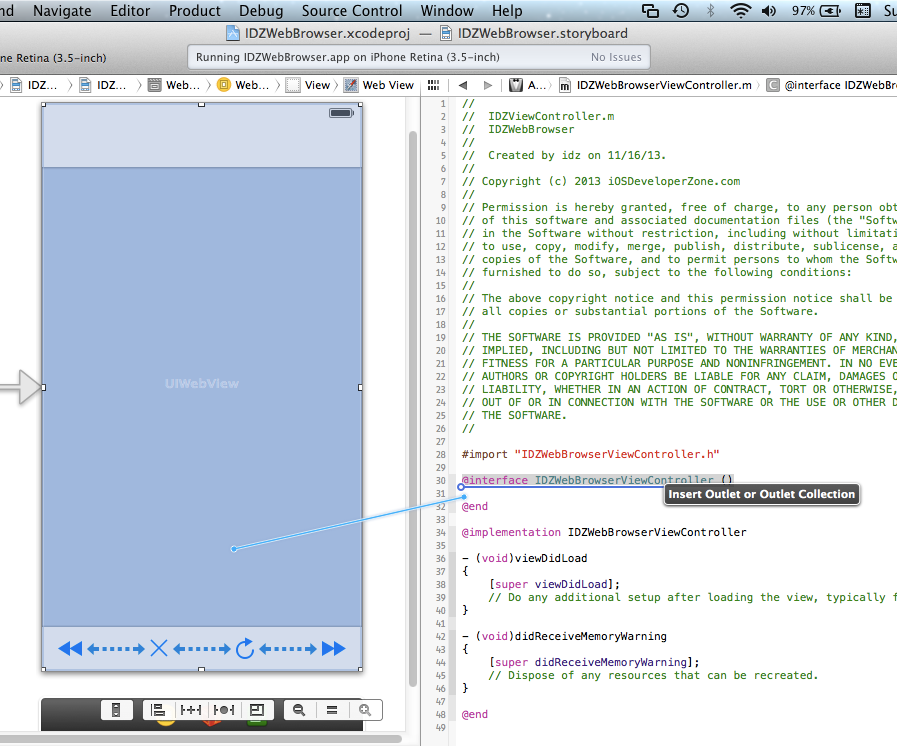
Click-drag from the UIView to create a property.
In the callout that appears when you release the drag enter webView into the name field.
Repeat this process for the four toolbar buttons, naming them back, stop, refresh and forward respectively.
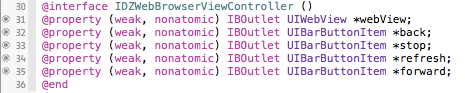 Your code should now look something like this.
Connecting Buttons to Actions
In addition to creating outlets that allow your code to access elements of your UI, it also possible to connect buttons to actions in Interface Builder. You can do this to connect you back, stop, refresh and forward buttons to your UIWebView.
In your storyboard control-drap from the back button on the toolbar to the UIWebView as shown below.
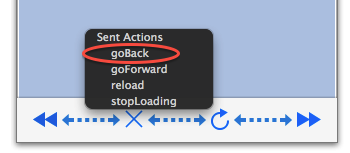 When you release, choose goBack from the popup that appears.
Repeat this process to connect the stop button to the stopLoading action, the refresh button to the reload action and the forward button to the goForward action.
At this point, you are almost ready to leave Interface Builder and write some code, but before doing so click on the UIWebView and in the Attributes Inspector click the Scales Page to Fit checkbox.
Loading a Web Page
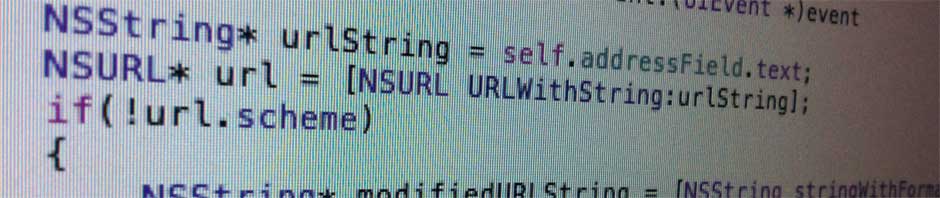
A little bit of code is needed to load a web page into your web browser. Add the highlighted code to the end of IDZWebBrowserViewController class extension.
|
1 2 3 4 5 6 7 8 9 |
@interface IDZWebBrowserViewController () @property (weak, nonatomic) IBOutlet UIWebView *webView; @property (weak, nonatomic) IBOutlet UIBarButtonItem *back; @property (weak, nonatomic) IBOutlet UIBarButtonItem *stop; @property (weak, nonatomic) IBOutlet UIBarButtonItem *refresh; @property (weak, nonatomic) IBOutlet UIBarButtonItem *forward; - (void)loadRequestFromString:(NSString*)urlString; @end |
And near the end of the implementation section add:
|
1 2 3 4 5 6 |
- (void)loadRequestFromString:(NSString*)urlString { NSURL *url = [NSURL URLWithString:urlString]; NSURLRequest *urlRequest = [NSURLRequest requestWithURL:url]; [self.webView loadRequest:urlRequest]; } |
Finally, for testing purposes, add the highlighted line to your viewDidLoad method.
|
1 2 3 4 5 6 |
- (void)viewDidLoad { [super viewDidLoad]; // Do any additional setup after loading the view, typically from a nib. [self loadRequestFromString:@"http://iosdeveloperzone.com"]; } |
You should now be able to compile and run your project. If all goes well you should see the homepage of this site displayed. You should also be able to follow links and the back, forward, stop and reload buttons should all work.
If something does not seem to work, update your viewDidLoad method as follows. This code will detect which connections are not correct.
|
1 2 3 4 5 6 7 8 9 10 11 12 13 14 15 16 |
- (void)viewDidLoad { [super viewDidLoad]; NSAssert([self.webView isKindOfClass:[UIWebView class]], @"You webView outlet is not correctly connected."); NSAssert(self.back, @"Your back button outlet is not correctly connected"); NSAssert(self.stop, @"Your stop button outlet is not correctly connected"); NSAssert(self.refresh, @"Your refresh button outlet is not correctly connected"); NSAssert(self.forward, @"Your forward button outlet is not correctly connected"); NSAssert((self.back.target == self.webView) && (self.back.action = @selector(goBack)), @"Your back button action is not connected to goBack."); NSAssert((self.stop.target == self.webView) && (self.stop.action = @selector(stopLoading)), @"Your stop button action is not connected to stopLoading."); NSAssert((self.refresh .target == self.webView) && (self.refresh.action = @selector(reload)), @"Your refresh button action is not connected to reload."); NSAssert((self.forward.target == self.webView) && (self.forward.action = @selector(goForward)), @"Your forward button action is not connected to goForward."); NSAssert(self.webView.scalesPageToFit, @"You forgot to check 'Scales Page to Fit' for your web view."); // Do any additional setup after loading the view, typically from a nib. [self loadRequestFromString:@"http://iosdeveloperzone.com"]; } |
You can also compare your work to this version: GitHub IDZWebBrowser Step2
Monitoring the UIWebView’s state: Implementing UIWebViewDelegate
The current UI has some problems that can easily be solved with a little more code: all the buttons on the toolbar are enabled all the time and there is no indication to the user that network activity is taking place.
To add a method to update the state of the toolbar buttons, add the following declaration to your class extension at the top of the implementation file.
|
1 |
- (void)updateButtons; |
Then add the following code to the implementation section.
|
1 2 3 4 5 6 |
- (void)updateButtons { self.forward.enabled = self.webView.canGoForward; self.back.enabled = self.webView.canGoBack; self.stop.enabled = self.webView.loading; } |
This code uses the UIWebView’s properties to determine which buttons should be enabled. This code needs to be called any time the state of the UIWebView changes. The UIWebViewDelegate protocol allows your view controller to be informed when the web view changes state.
To declare that you view controller implements the protocol, modify the class extension line.
|
1 |
@interface IDZWebBrowserViewController () <UIWebViewDelegate> |
Next in the implementation section add the delegate methods.
|
1 2 3 4 5 6 7 8 9 10 11 12 13 14 15 |
- (void)webViewDidStartLoad:(UIWebView *)webView { [UIApplication sharedApplication].networkActivityIndicatorVisible = YES; [self updateButtons]; } - (void)webViewDidFinishLoad:(UIWebView *)webView { [UIApplication sharedApplication].networkActivityIndicatorVisible = NO; [self updateButtons]; } - (void)webView:(UIWebView *)webView didFailLoadWithError:(NSError *)error { [UIApplication sharedApplication].networkActivityIndicatorVisible = NO; [self updateButtons]; } |
These routines ensure that the updateButtons is called at the right times and also they display a network activity indicator in the status bar when the web view is loading.
All the remains is to connect the UIWebView delegate to your view controller. This can be done in Interface Builder, but it is also easily done by adding the highlighted line before the call to loadRequestFromString: in viewDidLoad.
|
1 2 3 4 5 6 7 8 9 |
- (void)viewDidLoad { [super viewDidLoad]; // NSAsserts not shown... self.webView.delegate = self; [self loadRequestFromString:@"http://iosdeveloperzone.com"]; } |
If you compile and run the project now you should see that the toolbar buttons will enable and disable appropriately.
Clearly a web browser that can only visit a single site is of limited use, in part two of the tutorial you will customize the navigation bar to add an address bar and a title label to allow users to enter a URL and to display the title of the web page.
Source Code Download
The complete source code for this tutorial can be downloaded here:
You can also compare your work to this version: GitHub IDZWebBrowser Step3
Pingback: Tutorial: Building a Web Browser with UIWebView Revisited (Part 2) | iOS Developer Zone
Pingback: Tutorial: Building a Web Browser with UIWebView (Part 1) | iOS Developer Zone
Pingback: Tutorial: Building a Web Browser with UIWebView Revisited (Part 1) | iOS Developer Zone - appgong
Hey could you tell me how i can make the webview fit when i switch my phone to landscape mode?