If you completed part two of the tutorial and it seems to be working well you can continue with your current project, or if you prefer you can download the starting point here: GitHub IDZWebBrowser Step4
Outstanding Issues
In this tutorial, you will fix the issues noted at the end of part two, I have reordered them slightly so that dependent issues are dealt with in order:
- the keyboard displayed is not the URL keyboard so it is awkward to type a URL,
- the keyboard auto-capitalization mode is inappropriately set,
- there is no clear button in the address field,
- if the user omits the
http:// the page will not load,
- the address field can get out of sync with the displayed page,
- if an error occurs, the user is never informed.
Fixing the Keyboard Configuration
Currently the keyboard type that appears is not really suitable for entering URLs. Much of the punctuation needed requires switching to another keyboard.
The keyboard type that appears when any subclass of UIResponder becomes first responder is controlled by the keyboardType of the object. Possible values are:
- {objc}UIKeyboardTypeDefault{/objc}
- {objc}UIKeyboardTypeASCIICapable{/objc}
- {objc}UIKeyboardTypeNumbersAndPunctuation{/objc}
- {objc}UIKeyboardTypeURL{/objc}
- {objc}UIKeyboardTypeNumberPad{/objc}
- {objc}UIKeyboardTypePhonePad{/objc}
- {objc}UIKeyboardTypeNamePhonePad{/objc}
- {objc}UIKeyboardTypeEmailAddress{/objc}
In your case you can make the appropriate keyboard appear by inserting the following line in viewDidLoad in WebBrowserViewController.m.
    address.font = [UIFont systemFontOfSize:17];
    address.keyboardType = UIKeyboardTypeURL;
    [address addTarget:self
                action:@selector(loadAddress:event:)
      forControlEvents:UIControlEventEditingDidEndOnExit];
    [navBar addSubview:address];
If you compile and run your code now you should find that the keyboard that appears has ‘/’ and ‘.com’ keys.
There are still problems with the keyboard. When you use backspace to erase the currently displayed URL the keyboard automatically switches to uppercase.
The keyboard auto-capitalization behavior is controlled by the autocapitalizationType property of the first responder. Possible values are:
UITextAutocapitalizationTypeNoneUITextAutocapitalizationTypeWordsUITextAutocapitalizationTypeSentencesUITextAutocapitalizationTypeAllCharacters
Add this line of code after the one you just added:
    address.autocapitalizationType =
                UITextAutocapitalizationTypeNone;
Compile and run your project and confirm that the auto-capitalization behavior is now correct.
Adding a Clear Button to the Address Field
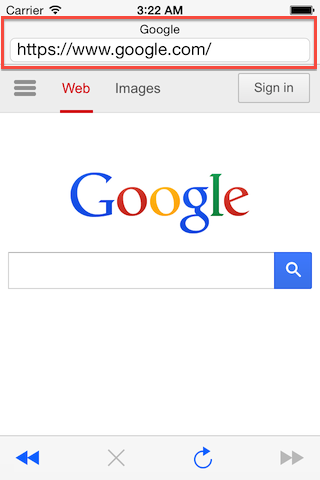
As it stands, if the address field is already displaying an address you have to backspace until you have erased the entire address. This is quite tedious. In Safari when you edit an address an ‘X’ in a grey circle appears on the right hand side of the address field. Touching this icon erases the complete field. Clearly this behavior is more desirable.
The clearButtonMode property of UITextField controls when this “clear button” is displayed. Possible values are:
UITextFieldViewModeNeverUITextFieldViewModeWhileEditingUITextFieldViewModeUnlessEditingUITextFieldViewModeAlways
In your case, the closest match to the behavior exhibited by Safari is UITextFieldViewModeWhileEditing.
Just after the last line of code you added add:
address.clearButtonMode =
             UITextFieldViewModeWhileEditing;
Save everything, compile and run your project now. You should see the clear button appear when you start editing a URL.
Correcting User Input
Most modern web browsers allow the user to drop the “http://” prefix on URLs. At this point, if a user omits this prefix in your browser the page will not load. (In fact, an error will be generated but will have pushed off dealing with errors until the end of the tutorial.)
It is fairly simple to fix this. Edit your loadRequestFromString: method as follows.
- (void)loadRequestFromString:(NSString*)urlString
{
    NSURL *url = [NSURL URLWithString:urlString];
    if(!url.scheme)
    {
        NSString* modifiedURLString = [NSString stringWithFormat:@"http://%@", urlString];
        url = [NSURL URLWithString:modifiedURLString];
    }
    NSURLRequest *urlRequest = [NSURLRequest requestWithURL:url];
    [self.webView loadRequest:urlRequest];
}
This solution uses the scheme property of the NSURL class to determine whether the user set a scheme (the part of the URL before the colon). If not it prepends “http://” this will correct entries like www.yahoo.com to http://www.yahoo.com.
Compile and run your your code. Enter “www.yahoo.com” and verify that the correct web page is loaded.
Keeping the Address Field in Sync
If you use the back or forward buttons, or follow a link, the address bar is not in sync with the displayed page. It turns out there is more to solving this problem than meets the eye. So first define a method to update the address bar.
Add the following definition to your class extension:
- (void)updateAddress:(NSURLRequest*)request
The implementation of this method looks like this. Add this to your IDZWebBrowserViewController.m.
- (void)updateAddress:(NSURLRequest*)request
{
    NSURL* url = [request mainDocumentURL];
    NSString* absoluteString = [url absoluteString];
    self.addressField.text = absoluteString;
}
The key point about this code is that instead of requesting the URL from NSRequest you are requesting the mainDocumentURL which is more appropriate to show in the address field.
So this code solves how to display an updated URL in the address field, but not how and when you will be informed.
On the face of it, it should be simple. According to Apple documentation the delegate method webView:shouldStartLoadWithRequest:navigationType: is called before the web view starts loading content.
So the following code modification should ensure that your address field is always in sync with the currently displayed page.
- (BOOL)webView:(UIWebView *)webView shouldStartLoadWithRequest:(NSURLRequest *)request navigationType:(UIWebViewNavigationType)navigationType
{
    [self updateAddress:request];
    return YES;
}
It turns out that this works most of the time, except when you use the “back” and “forward” buttons. It seems that sometimes calling goBack or goForward does not call shouldStartLoadWithRequest.
A reasonable workaround for this problem is to add the following code to your webViewDidFinishLoad:
- (void)webViewDidFinishLoad:(UIWebView *)webView
{
    [UIApplication sharedApplication].networkActivityIndicatorVisible = NO;
    [self updateButtons];
    [self updateTitle:webView];
    [self updateAddress:[webView request]];
}
Reporting Errors to the User
When UIWebView encounters an error it invokes the didFailLoadWithError method of its delegate.
You could handle the error right in the delegate method, but as your programs get bigger having a central error handling routine will be useful (a more general solution to this will be the topic of a future tutorial). So just add the highlighted code to your didFailLoadWithError.
- (void)webView:(UIWebView *)webView didFailLoadWithError:(NSError *)error
{
    [UIApplication sharedApplication].networkActivityIndicatorVisible = NO;
    [self updateButtons];
    [self informError:error];
}
Since this method is not yet declared you should add a declaration in your class extension.
- (void)informError:(NSError*)error;
The UIAlertView class provides a convenient way of alerting users of errors.
Add the following code to WebBrowserViewController.m.
    UIAlertView* alertView = [[UIAlertView alloc]
                              initWithTitle:NSLocalizedString(@"Error", @"Title for error alert.")
                              message:localizedDescription delegate:nil
                              cancelButtonTitle:NSLocalizedString(@"OK", @"OK button in error alert.")
                              otherButtonTitles:nil];
The NSError class offers a variety of messages, but for your simple error handler the localizedDescription is the most appropriate. As regards the UIAlertView since there is no other sensible action that the user can do other than acknowledge the error a simple “OK” button will suffice, that is, “retry” or other options probably don’t make sense here.
Once you’ve made this change you can compile and run your project. You should now have a fully functional, albeit at a basic level, web browser.
Conclusion
Over the the three tutorials of this project you have learned a lot. You have used Interface Builder to layout a basic UI that contained a UIToolbar, a UIWebView and a number of UIBarButtonItems. You augmented this UI programmatically with a UINavigationBar, UILabel and a UITextField. To keep your UI in sync with the UIWebVIew your UIViewController subclass implemented the UIWebViewDelegate protocol and, when thing went wrong, you used UIAlertView to inform the user. Not bad for a few hours work!
Download the Source Code
You can download the completed code for this tutorial here:
GitHub IDZWebBrowser Step5
This web site is ad supported. If you would like to see other great tutorials like this one please visit one of our sponsors.

 I’ve updated my precompiled