
I love my 11″ MacBook Air. But as a developer, its 120GB SSD has become an issue. With new versions of iOS, beta versions of Xcode and the various Apple programs that don’t play well with external hard drives (I am looking at you iTunes and iPhoto) I seem to be constantly shuffling stuff on and off my G|Drive slim external drive. Finally, exasperated with my new role as a human cache manager, I decided to try to find a solution.
With a quick bit of googling I quickly found the OWC Aura SSD Upgrades page. I chose the 480GB Aura Pro SSD + Envoy + Tools bundle (for $415 plus tax and shipping at time of writing). The Envoy is a case that allows you to use your old SSD as an external drive. The Pro version offers slightly faster write times and a longer warranty than the regular version.
You should be aware that Apple does not view the MacBook Air SSD as a user-upgradable item and what is described in this article may void your warranty.
Update: OWC contacted me to clarify some issues relating to warranties. For more information please see the information provided by Eileen Millard in the comments section below.
Installation

The surprisingly compact Aura Pro Envoy kit. (I though they had left something out!)
After unpacking all the contents of the kit, I pointed my iPad to an installation video and began.
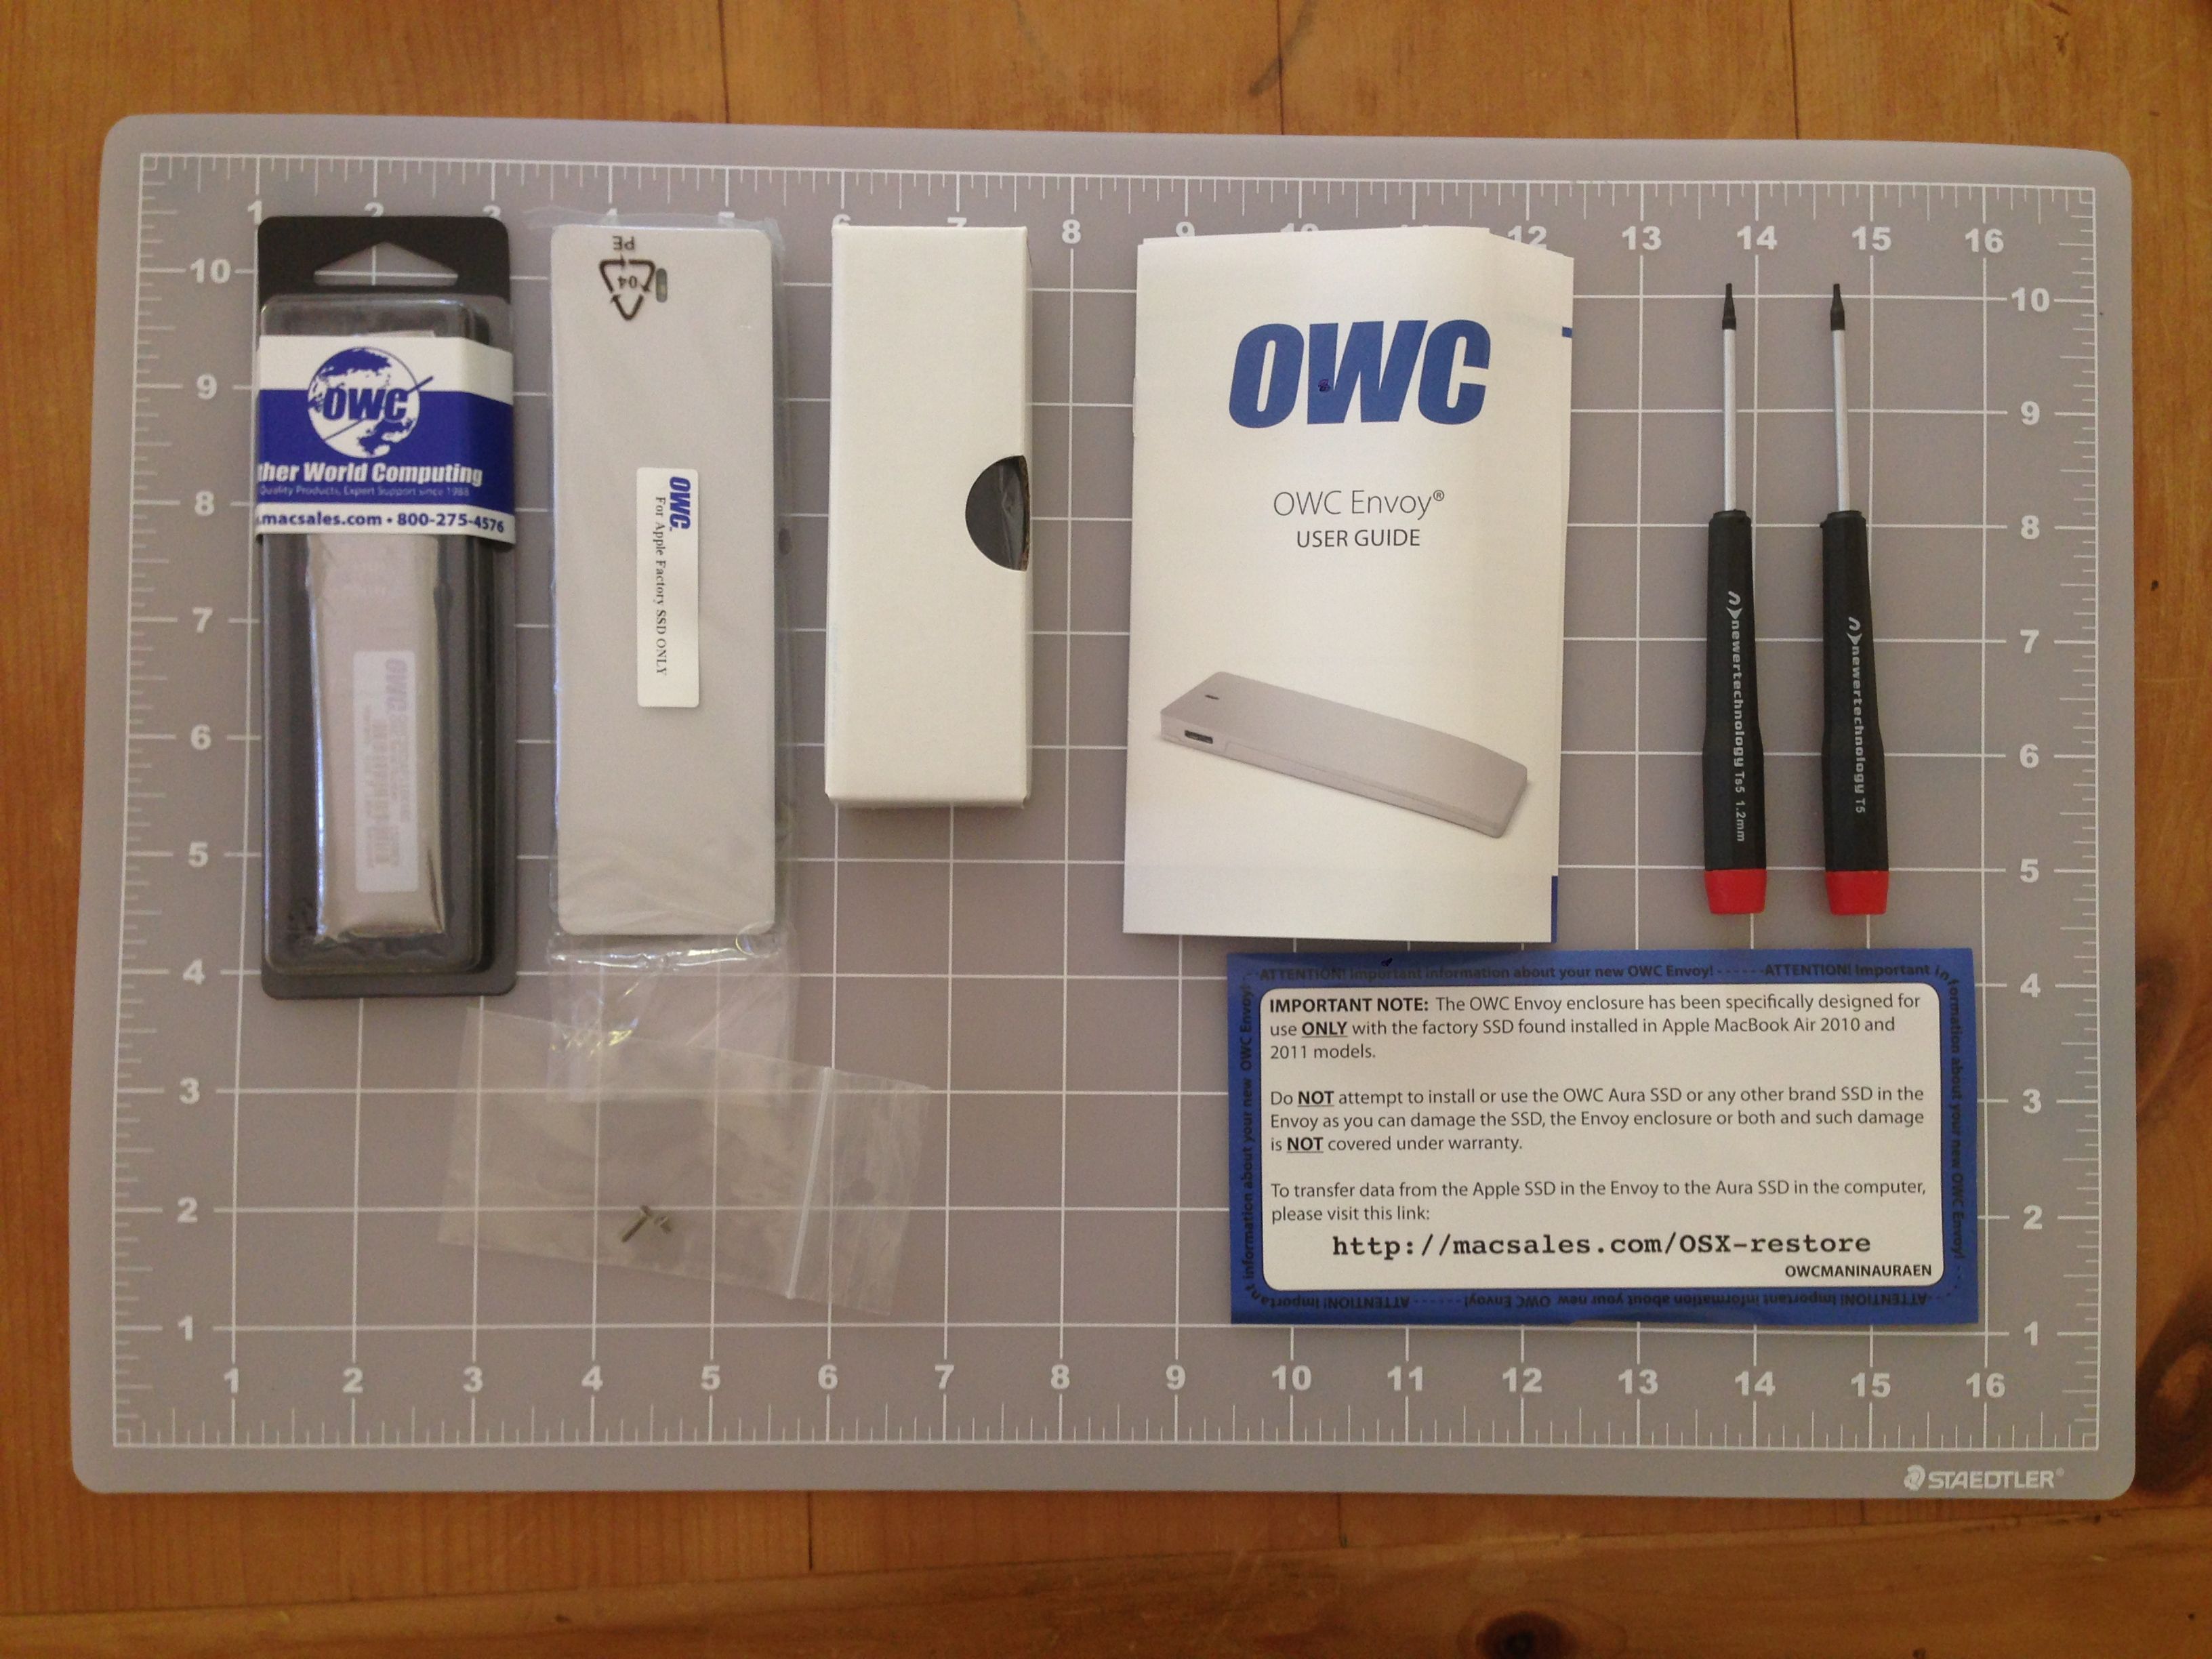
Contents of the Auro Pro SSD + Envoy + Tools kit.
The screws on the bottom of the MacBook Air are tiny, so it was with some trepidation that I began slowly unscrewing them. I really was afraid I would strip them. I also recommend having a few cups close by to keep the various screws organized.
The installation process went remarkably smoothly and soon the new SSD was in place and I was ready to close up my machine.

View of the installed Auro Pro, just before closing case.
In all the entire procedure took about half an hour, even with my super-slow unscrewing and refastening of the case.
Data Recovery
The instructions link to by the kit recommended a fresh OS install and then a Time Machine restore, a procedure I dutifully followed.
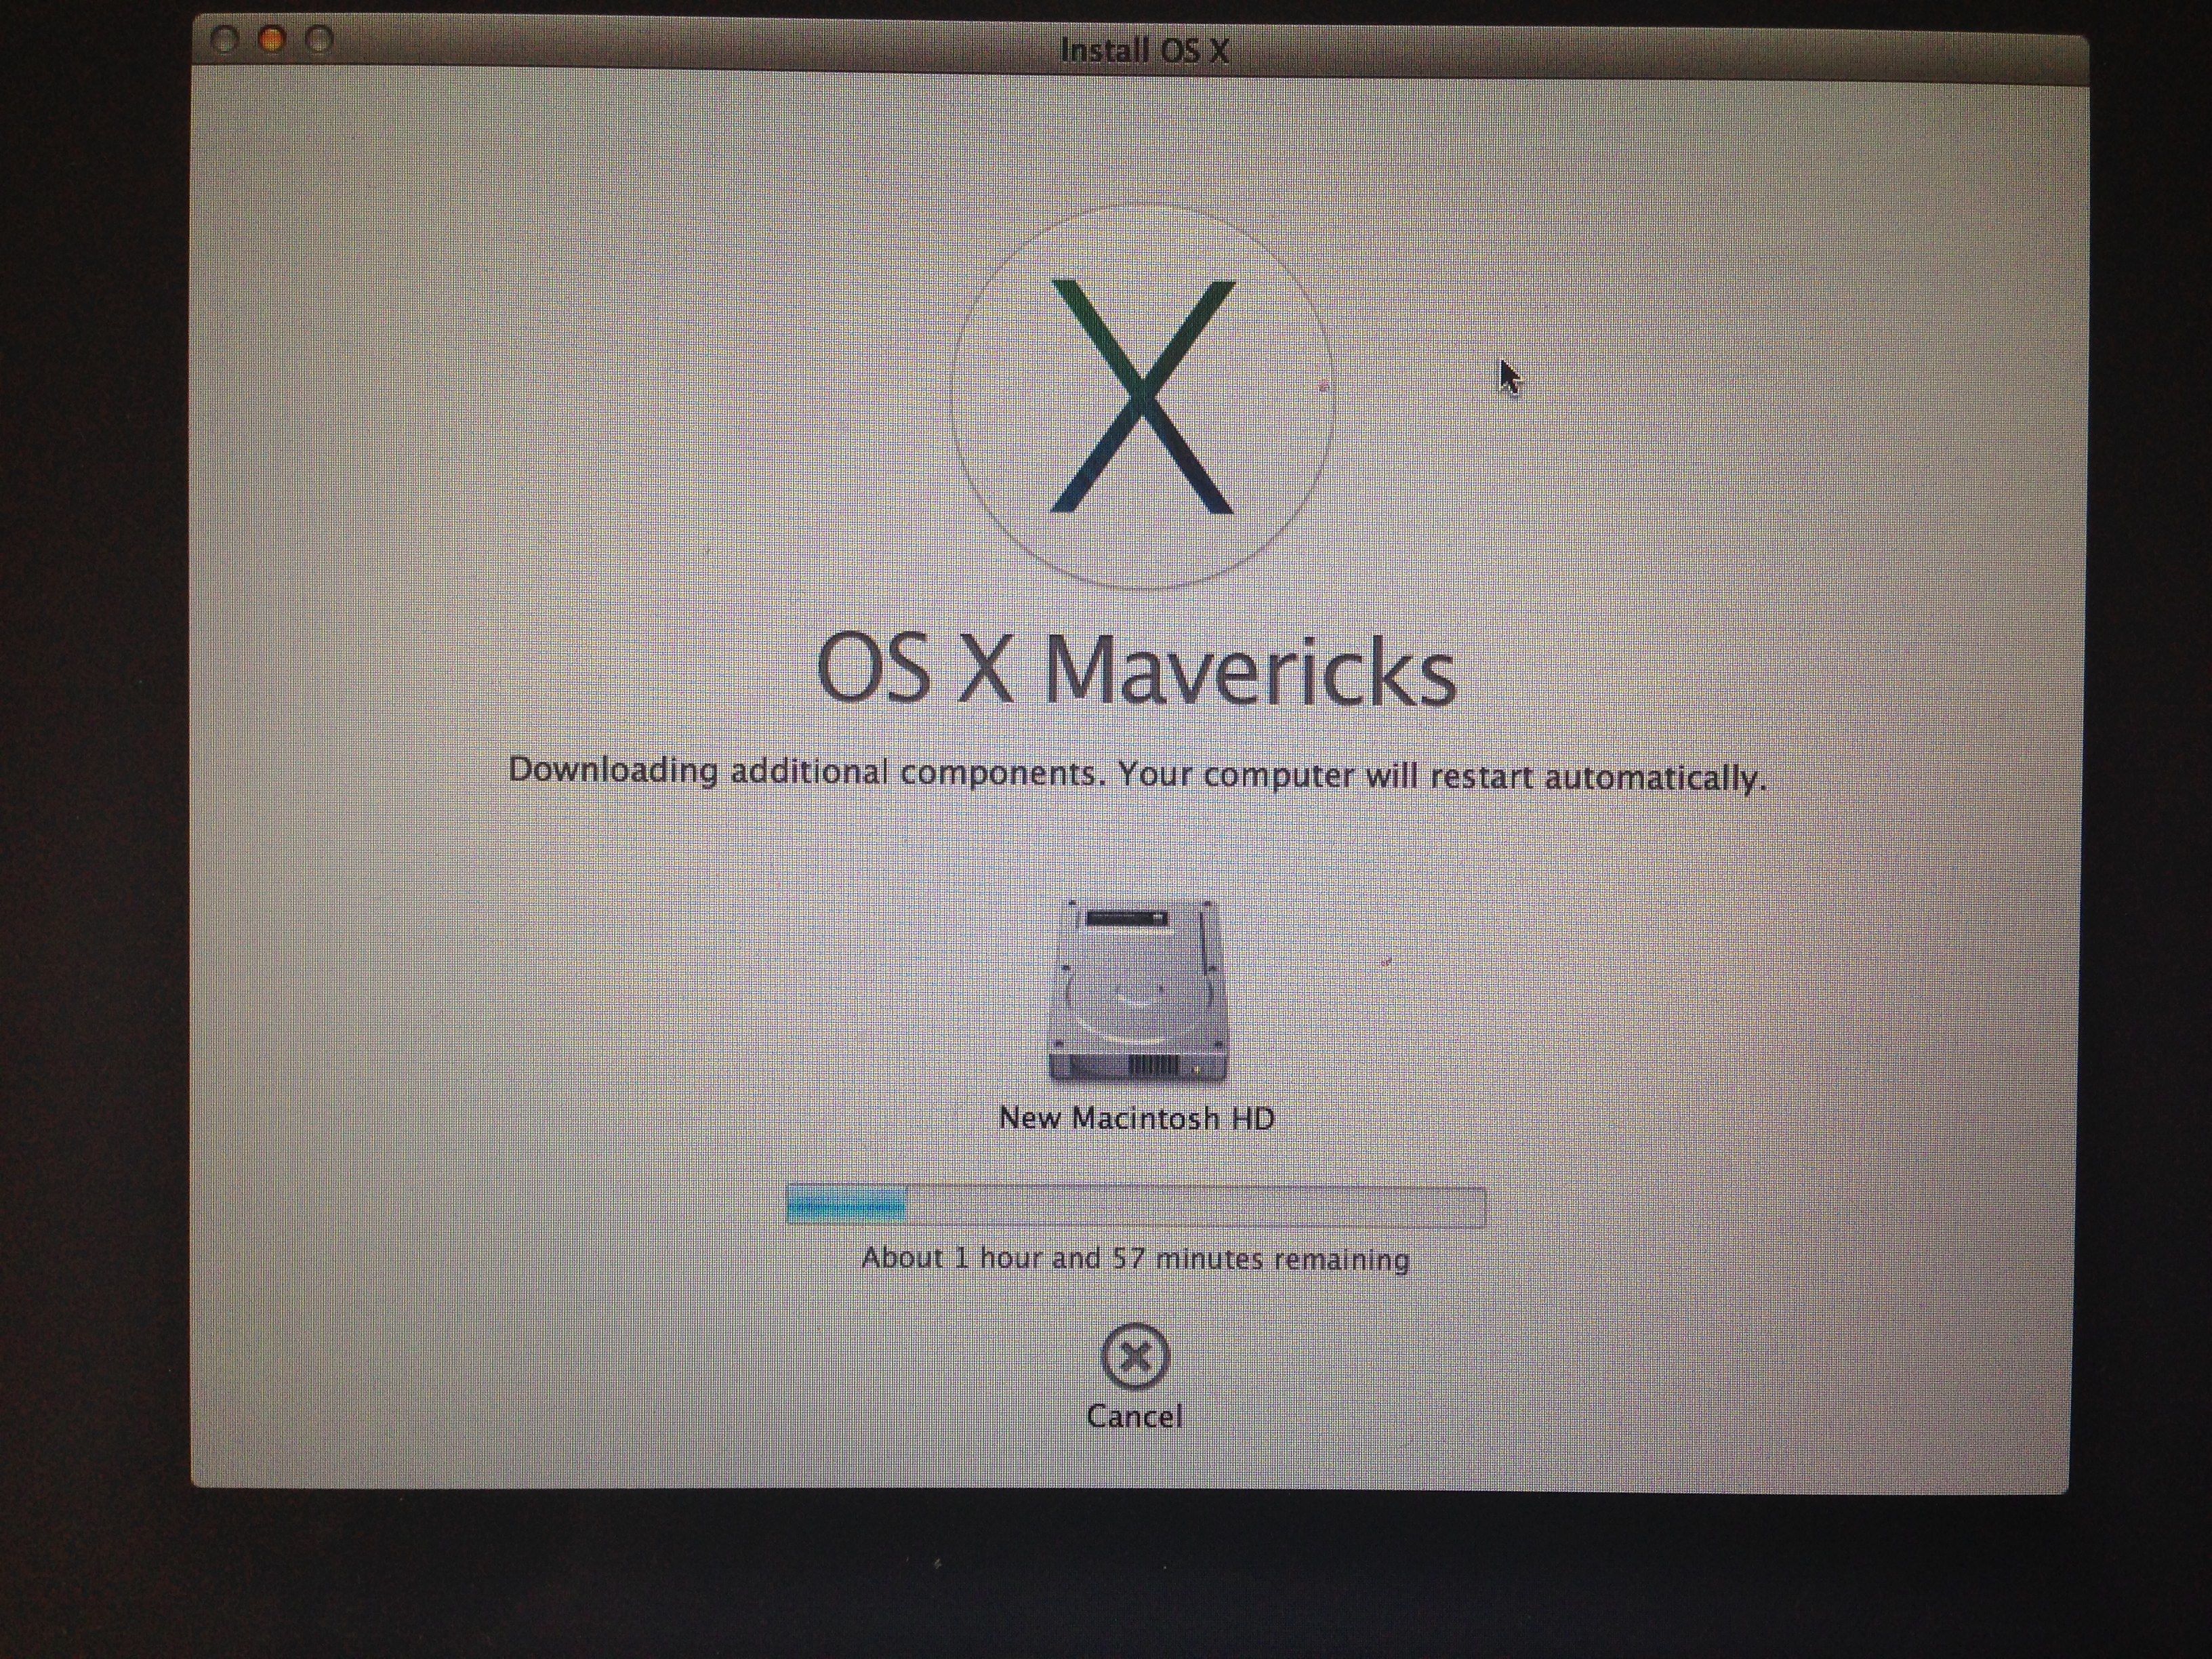
Reinstalling Mavericks
I had been pleasantly surprised at how quickly the hardware upgrade had gone, the data recovery was another matter. It took hours to download and install Mavericks (around 4) and then I started the Time Machine recovery. I ended up letting this process run overnight. I checked on it once and the recovery had completed but it was beginning on its first backup of the new system; it seemed to think everything was new. The following morning I awoke to fully restored machine with lots of free disk space.
Performance
I wanted to make sure that the performance of the upgraded SSD was the same or better than the stock one, so before the upgrade I ran three I/O benchmarks using XBench and I repeated these afterwards. The results can be seen below; the error bars are actually indicating the minimum and maximum data rate measured in each case. Essentially the upgrade performed better or around the same in all but one of the tests – 256K random writes – but the difference seemed small and this test was less than rigorous.

SSD Performace Before and After Upgrade
A Few Weeks Later
I decided not to publish this post until I could post an after note with it, to see if I was still happy with the upgrade a few weeks later and I have to say I am. It really has been great to be able to have multiple versions (5 at the time of writing) of Xcode on my laptop and multiple copies of my projects compiled with each one while trying validate builds and track down any errors. Had I realized the difference it would make I would have done this much sooner.
Good afternoon,
I was wondering if you had considered my request, sent in on Oct. 30, 2014:
===============
“I wanted to thank you for the thorough, well written review of the OWC Aura Pro SSD Envoy Upgrade Kit for MacBook Air, that ran 10-14-14. I’d also like permission to run the review on the product pages and on our Press room.
I did have one comment about this line of the article:
“You should be aware that Apple does not support upgrading the SSD drive and what is described in this article will (most likely) void your warranty.”
There is a lot of misinformation/misconception on Apple warranties. There is a piece of federal legislation called the Magnusson-Moss Act, which provides consumer protections. In this case, the manufacturer has the burden of proof that the addition of a modification results in the failure of other components.
EX: Apple couldn’t claim a computer screen failed because a hard drive was upgraded …and if they did, they would have to prove such.
The only thing they could say wasn’t covered is the actual hard drive bay — if someone puts a hard drive in wrong and damaged the bay, that would not be covered under warranty.
In the same example, an additional reason Apple would not jump in to void a warranty when a customer upgrades a hard drive is that the Apple site itself offers directions on how to do that, as is seen in this sample link:
http://support.apple.com/manuals/#install%20hard%20drive
In the eight years I have been here, I have not heard of one OWC customer being denied warranty coverage by the specific act of installing memory, drive, etc, into their machine.
I look forward to hearing back from you, about permission for us to run the review. And again, thank you for a great review!”
=========
I also had a comment sent to me from our Product Development Department, about this part of the article:
“Data Recovery”
“I had been pleasantly surprised at how quickly the hardware upgrade had gone, the data recovery was another matter. It took hours to download and install Mavericks (around 4) and then I started the Time Machine recovery. I ended up letting this process run overnight. I checked on it once and the recovery had completed but it was beginning on its first backup of the new system; it seemed to think everything was new. The following morning I awoke to fully restored machine with lots of free disk space.”
I was told that the data recovery section needed a little clarification. The reason the recovery took so long is because it appeared you were running an internet recovery. That has nothing to do with the speed of the SSD; the limiting factor is the speed of the machine that is downloading the OS components from Apple, not how fast they’re copying to the SSD.
=========
Thank you,
Eileen Millard
OWC Public Relations Manager
eileen@macsales.com
815-333-5023