
I try to make sure that all my Open Source repositories on GitHub compile and run correctly, but it is easy to miss some dependency on my system or some other bug. So it’s nice to have the ability to build on a fresh virtual machine, automatically, each time I push. This is exactly what Travis Continuous Integration (CI) offers and it’s free for Open Source projects! I had dragged my heels about figuring out his to use Travis. I envisaged torturous configuration files and long hours of frustration. I was wrong. In this post I will explain how you can get a basic Travis build working for an iOS project hosted on GitHub. It should take you less that 10 minutes.
Ensure Your Code Builds Locally
The first step is to ensure that you can successfully build from the command line on your local machine. Check out a fresh copy of your repository, change directory to where your project file is and issue the following command (substituting your build scheme name for `ADZAQAudioPlayer` of course).
xcodebuild clean build -scheme IDZAQAudioPlayer -destination 'platform=iOS Simulator,name=iPhone 6,OS=8.0'
If this goes well you are ready to proceed, otherwise fix any problems.
Make Your Build Scheme Shared
By default, your build schemes are not checked into source code control, so they are not available to Travis via GitHub. To change this go to Product > Scheme > Manage Schemes… and check the Shared check box for any schemes you want to include in your build.
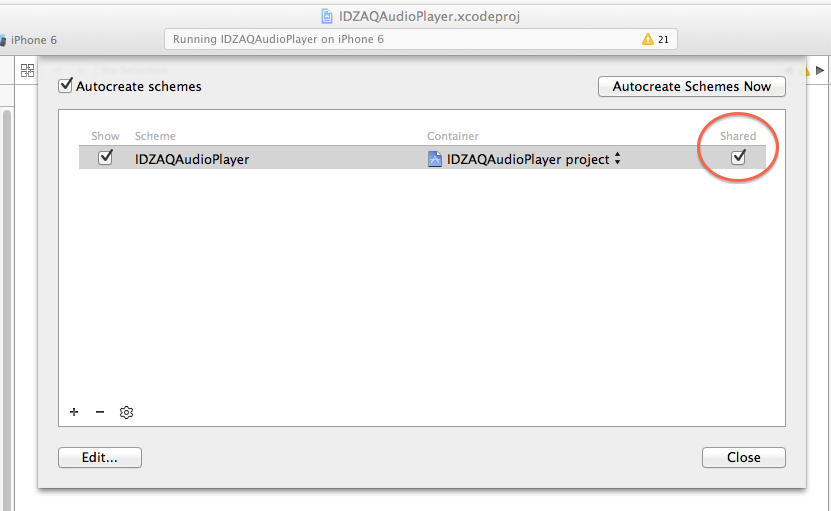
Check the Shared box to share you build scheme.
Write Your .travis.yml File
The Travis build file, `.travis.yml`, is very straightforward. You need to specify `language: objective-c` to ensure your build is run on a Mac; if your forget this it will be scheduled on a Linux VM. You can optionally have an `install` section where you can install any dependencies needed for you build. The most important part of the build file is the `script` section which tells Travis which commands to run to execute your build. Each command is prefaced with a `-` (this is part of the YAML format).
The most basic Xcode build file will look like this:
language: objective-c

script:
- xcodebuild build -scheme IDZAQAudioPlayer -destination 'platform=iOS Simulator,name=iPhone 6,OS=8.0'
If `IDZAQAudioPlayer` had tests, these could also be run by appending the following to the file.
- xcodebuild build -scheme IDZAQAudioPlayer -destination 'platform=iOS Simulator,name=iPhone 6,OS=8.0'
Sign On to the Travis Website and Enable Integration
To sign in to Travis go to https://travis-ci.org and click the Sign in with GitHub item in the top right corner. The first time you do this it will ask you to confirm access to GitHub and perhaps a few other questions. Once this is complete, go to the Accounts section. You can get there by choosing Accounts from the drop down menu that appears when you hover on your avatar in the top left corner of the screen.
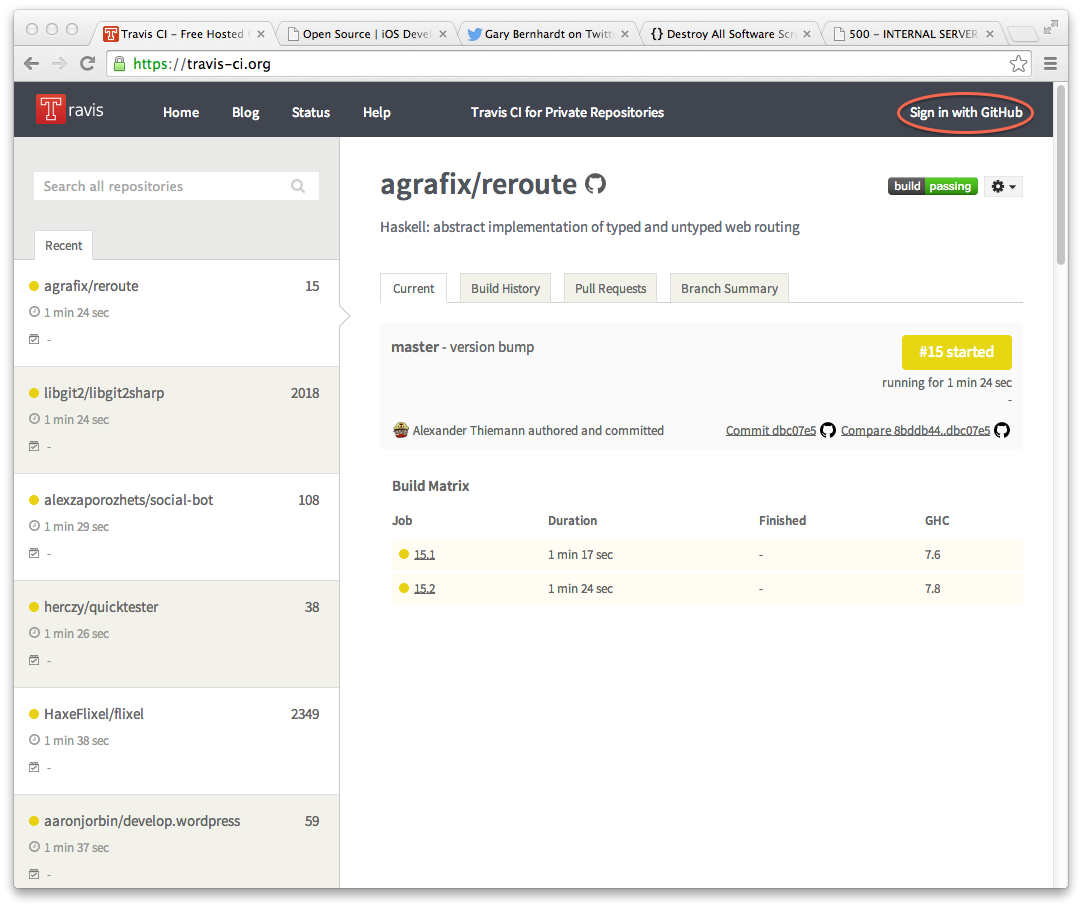
Click the Sign in with GitHub item.
The accounts section should list all your repositories at GitHub; if it does not you may need to press the Sync Now button. Then flip the switch beside the project you want Travis to monitor.
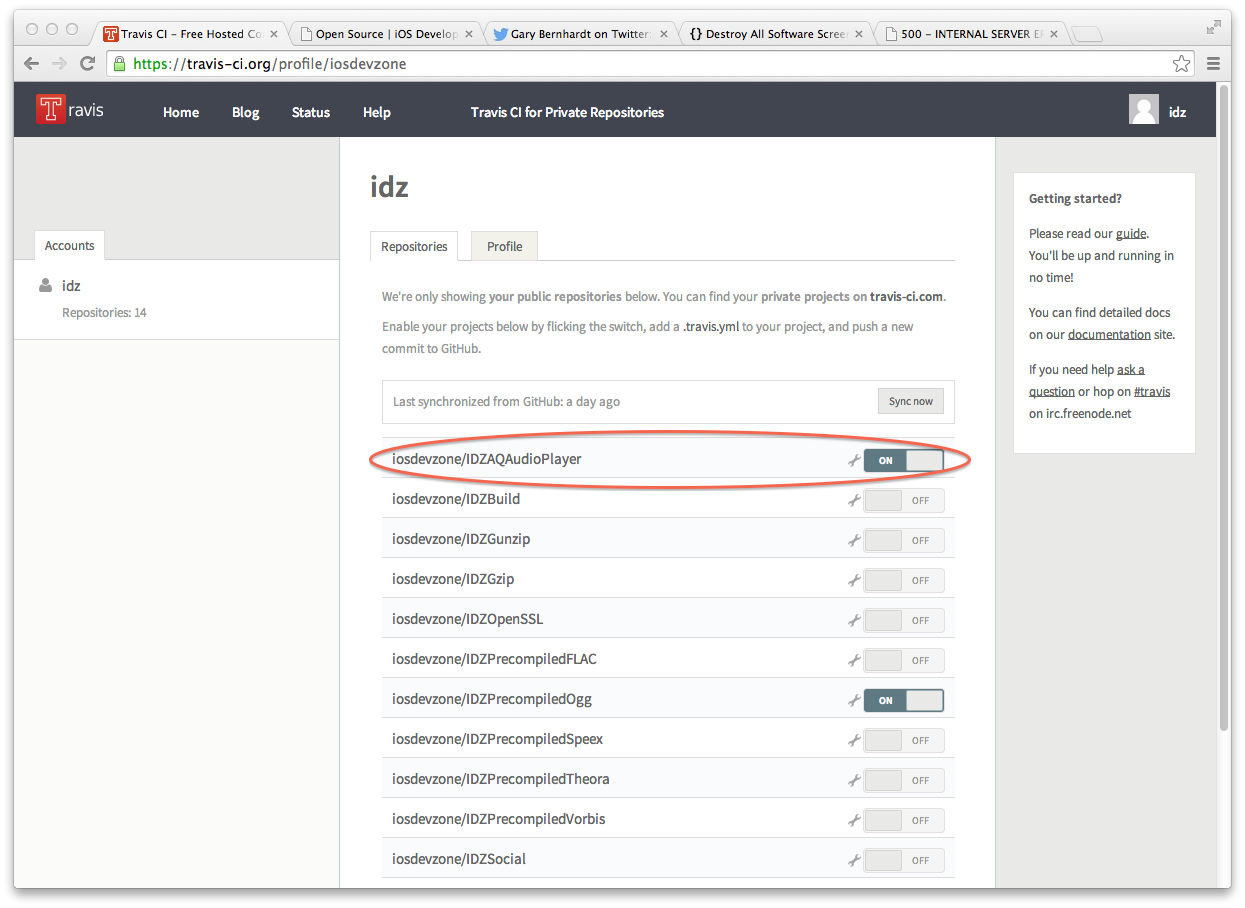
Flip the switch to turn on Travis integration.
Push to GitHub
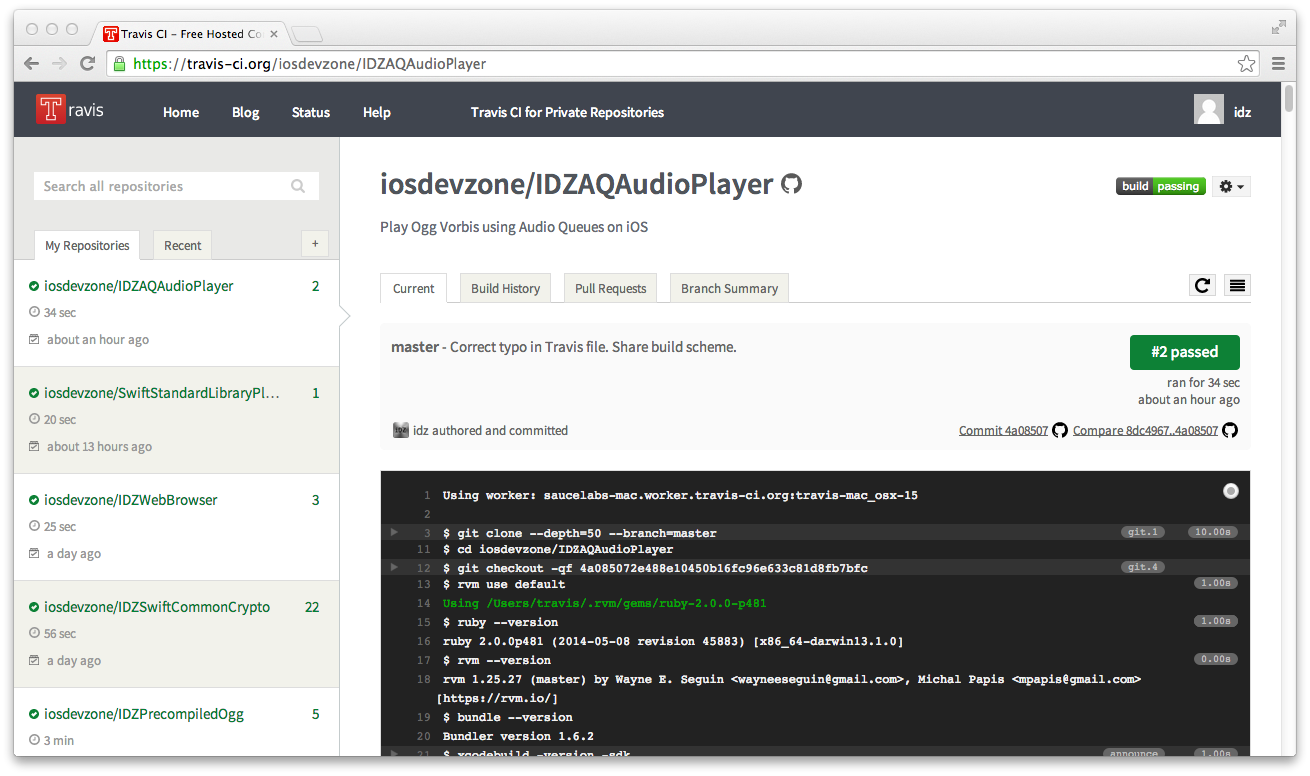
To test your build, commit the `.travis.yml` file you created earlier and push to GitHub. You build should appear on the Travis site momentarily and begin executing. You can monitor the build’s progress on the Travis site by clicking the spanner/wrench icon beside the switch for the project and choosing the Monitoring a Travis Build
Adding Build Status Icon to README.md
Clicking on the build status indicator (it looks something like this  ) brings up a dialog that allows to copy code to paste into web sites, mark down documents or blogs. Choose the Markdown option and paste it close to the top of your repository `README.md`. You can also use it to create a page displaying the status of all your builds. I do this for my repositories on the Open Source page.
Obviously this post only scratches the surface of what you can do with Travis, be sure to explore the documentation on their site. I hope I saved you some time with this quick introduction. If I did please consider visiting one of our sponsors’ sites or contributing directly to this site on Gratipay .